Category Archives: Crafts

Lakeshore, 3-Way Tabletop Easel Review & Giveaway To Celebrate National Crafts Month!!!

Lakeshore Logo

March is National Crafts Month and we love crafts all year in our family so we really thing giving them some recognition is so cool.  My children are all very creative and artistic and so you will find tons of craft supplies, markers, colored pencils, paints, chalks, paper and much more in our home.  My little ones really love to draw and so since they are so close in age and want to do everything together. The 3-Way Tabletop Easel from Lakeshore was the perfect choice for a great art center where they can paint, color and create their own masterpieces  together!

Lakeshore Easel

Right out of the box this easel is a cinch to get set up and you only need to do a quick 2 screw attachment on the tray with the alyn wrench included.  One side features a high quality chalk board that erases completely.  It is a real pet peeve of mine when chalk boards are hard to erase or do not erase completely without a great deal of elbow grease.

Lakeshore 3 Way Tabletop Easel

The other side is a dry erase white board and there is a tray underneath that extends out so each side has a place to hold paint, markers, chalk and other supplies.

Lakeshore 3 Way Tabletop Easel Pic 2

Two blue clips are included to hold paper.  This easel has been used daily since I opened it.  I like that it is lightweight and portable yet sturdy.  It is so easy to take it out on the deck on a nice day and let the kids paint or color outside and then just bring it back in when they are finished without having to lug something big around.

If you are looking for a great creative easel for your kids, check out

Easy Assembly

Easy Assembly


Easel2


easel1


easel3


easel4


Ethan's Muscle Man!!!

Ethan’s Muscle Man!!!

Lakeshore is sponsoring  a giveaway on Mommy Ramblings!  One lucky blog reader will win a 3-Way Tabletop Easel of their own!  Thank you Lakeshore for the review easel and for sponsoring this creative giveaway on Mommy Ramblings!!!  Open to US residents.

Lakeshore 3-Way Tabletop Easel Giveaway on Mommy Ramblings Rules:

Please enter to win using the Rafflecopter widget below.  Good Luck!!!

Continue reading


17 Comments

Filed under Crafts, Giveaway, Reviews, Toys

Vintage School Desk Transformation #3!!! American Seating Company Desk Gets A Facelift

I found this beauty scanning Craigslist in late winter or early spring and it was listed under furniture as “student desk.”  I was pleasantly surprised to find a vintage school desk in such great shape when I clicked the link.  The ad said the owner knew nothing about it and was asking for an offer.  I really wanted that desk so I offered him $35 cash, which he accepted immediately and I knew I should have started lower.  Oh well, after that I saw listing for very poor condition desks like this going for much more so I was not upset.

We picked it up and were glad to see all the great features it had.  The chair slides forward and back and swivels.  The desk has two different upright positions and it was in great shape.  Now I just wanted to repaint and refinish the seat so I had to decide on colors. I chose a gloss gray Rustoleum paint in a can and a red gloss Rustoleum paint that I used both spray and paint on versions.  For the seat, I sanded and then used a Minwax Polyshades all in one stain and varnish.    I love the way it turned out.  What do you think?

Here is the picture on Craigslist:

student desk copy


Here I am in the middle of painting, I was painting the inside, which I sprayed.

reddesk7

reddesk8

Nice and fresh and clean and pay attention to the quality tools I am using. That is a bonafide stick holding the desk at the proper angle for maximum coverage.

reddesk1

Here is the desk after refinishing the wood in one of the upright positions. It was very sunny so please excuse all the glare.


This is the desk in the other height for the elevated top.

This is the desk in the other height for the elevated top.


Sun in his eyes.

Sun in his eyes.


reddesk3

reddesk6

About the desk:


As I was painting I found the patent in many places and on the portion of the top that holds it in the 2 different upright positions I found this stamped in the metal.

reddesk


It is from the American Seating Company and is a Model Ten Twenty for which you can see an original ad below.  The desk was from the 1950s.

reddeskad


9 Comments

Filed under Crafts, DIY, hobby, Home Improvement

Decoupage Furniture with Fabric and ModPodge

Hope you all had a super weekend.  I had a really busy week, so I was thankful to have a relaxing and fun weekend.  I spent some time finishing or nearly finishing some of my many projects.  I finished decoupaging one of two little chairs.  I still need to seal everything with ModPodge and then I am going to seal the whole chair with a Poly Acrylic.  I have to do the other chair, but it should be easier now, since I know a few shortcuts and better ways to do things. I used fabric instead of paper, and it turned out really nice.

I’m almost done with the other school desk I am refinishing, I should be able to finish it tomorrow, at least I hope I will.  Then, I have to start on my 3rd desk project and start working on refinishing an antique desk for my studio/office.  After that, I plan to start that stair painting project that I told you about for the basement stairs, and the stairs to my studio.  I cannot wait to start painting the stairs!  All I need is time.

I need to decide whether I am painting the table that goes with the little chairs with grape or turquoise paint.  I am also toying with the idea of decoupaging the table top, but I don’t think I will, because I think the paint will be a nice contrast. Who knows though, I may change my mind and decoupage the table.  You can see the chair below that needs to be sealed. Let me know what you think of it.

decoupage chair


decoupage chair 1

Have you ever done any decoupaging with fabric. Let me know if you have, and how it turned out.


10 Comments

Filed under Crafts, DIY, hobby

Painting Vintage and Antique Furniture 101

One of the presents I wanted and received for Christmas this year was a computerized sewing machine.  So, do I sew?  If you call the owl pillow I made in 6th grade sewing, then yes, I do sew.  Of course, with a new sewing machine and new supplies, I needed a sewing table,  I knew I did not want a cheap table made of particle board. I started searching online and I found a sewing table I really liked (pictured below).

sewing table


What I didn’t like about it, was the nearly $600 price tag.  I started a search for something else, and in my search, I found an antique vanity for $35 on Craigslist.  They also had a $50 antique desk I bought as well, but that’s another post.

Anyway, with the vanity in hand, I needed to learn how to paint, distress and antique it to make it amazing. In my search, I discovered an awesome blog called, Oopsredone. Browsing the site,  I saw a few things she did in a turquoise paint called Holiday Cozumel Aqua that she later distressed and antiqued with Minwax stain.  I bought a gallon of the paint and started doing some ladder back chairs which will be featured in a future post. However, after painting the chairs, and noticing all the details on the vanity, I wanted to make things easier.

Armed with my paint chip, I found a very close match in a Rust-Oleum Painter’s Touch 2X  satin spray paint in a color called Lagoon.  I bought the Rust-Oleum Painter Touch Ultra Cover 2X Gray spray primer as well and drove home to get to work sanding.  I fixed one flaw in the top with Elmer’s Carpenters Max wood fill and then sanded, but since I wanted a distressed look, I decided to keep the edges the way they were.

PT2X_12oz_GrayPrimer_L

Rustoleum-Lagoon


vanity3

I primed, sanded with a fine sandpaper and spray painted the vanity. After that dried, I sanded lightly with a fine sandpaper and sprayed on another coat of paint. Next, I used Rust-Oleum Transformations, Decorative Glaze in Java Brown.  I had tried the Minwax stain method on the ladder back chairs, but it was harder to work with, and had a tendency to keep the piece sticky for some time.

I am so glad I tried the glaze, I absolutely love the results and the ease of use.  You just apply it and then wipe it off using varying pressure.  It is specially formulated to give you more time to work, so you can get the results you desire.  After that, I applied 2 coats of Minwax Polyurethane Satin to protect the finish.  Finally, I added some new hardware, and decoupaged some fun paper in the drawers and on the inside of the cabinet and door back.

The pictures do not do the piece justice. and I will take some more once I get it set up inside, I have some little things I am going to show you in another post about how I am organizing everything.  Anyway, If you have any questions on how I did anything. just ask in the comments.

vanity1

Sorry I did not take a better before picture, too excited to get to work!!!


vanity2

Primed Vanity

vanity4

Painted

vanity5

vanity6

vanity7

vanity8

vanity9

vanity11

vanity15

vanity14


vanity16


vanity18


15 Comments

Filed under Crafts, DIY, Home & Garden

Restoration Of A Vintage Little School Desk–A Labor of Love!!!

My father was a great man and he had a very successful career as an Engineer.  With his own business he designed and built churches, schools, industrial buildings, custom homes and much more.  More than once he brought home some school desks (quite a few) of various sizes.  They were mostly in pristine condition and having several I had my own classroom for my dolls and bears in my playroom.

The desks got shuffled between our lake house and our full-time home.  I know at one point when I had the first of my kids I had one brought up here but it remained in the basement of the lake house.  Several years ago I bought paint and had every intention of freshening it up but it never happened.  2 more kids happened and at some point it must have become damp or wet and rust happened.

However, I was steadfast in my determination and added it to my great list of projects.  Friday afternoon I unearthed it from my garage.  Yikes!  It was sad, and in very rough condition but I had a vision.  My husband also gave me some tools to achieve my vision.  First I went over the whole thing with a wire brush and next my husband gave me a very powerful drill with a circular metal bristle whosiawatzit that just like magic buffed and grinded that rust away and left me with bare metal to work with.

schooldesk


schooldesk1


After rust removal and primer.

After rust removal and primer.

schooldesk11


schooldesk4

First coat of paint and sanding in progress.

We added some wood glue where there was a little bit of separation in some of the wood layers and yes, we are being funny with all the clamps.

We added some wood glue where there was a little bit of separation in some of the wood layers and yes, we are being funny with all the clamps.

Started drizzling (never amounted to anything) while I was staining and so I had to move to the garage.

Started drizzling (never amounted to anything) while I was staining and so I had to move to the garage.

schooldesk8

schooldesk9

schooldesk10

After it was cleaned up, I applied a primer.  Let that dry, that was Friday night.  Saturday which was a busy day because it was Ethan’s birthday, I applied a coat of high gloss gray Rustoleum paint.  Then today, Sunday, I sanded the seat and backrest.  I taped and applied a second coat of paint, then stained the seat and backrest and applied a coat of polyurethane.  

The completed project only took a few hours in total between late Friday afternoon and late Sunday afternoon.  The poly is drying and I will bring it inside in about an hour to get some nicer pictures.  I am really proud to have this memory of mine in my house, to be used by my little ones.  It truly was a labor of love and it was amazing to breathe some new life into a tired, sad, little desk. 

This is the first of many projects I have planned.  So stay tuned for lots of transformations of all kinds.  Okay, off to add some felt feet and bring this baby inside.  I will update with a picture soon of the finished project.


7 Comments

Filed under Crafts, Decorating, DIY, hobby, Home & Garden

String Eggs; A Fun Easter Craft!!!

Sting eggs are an easy and fun craft project you can make to decorate for Easter and other occasions. To get started, you will need balloons, white glue and crochet thread.  The small water balloon type balloons work best because you can easily inflate them to look like eggs.

stringeggs

Make a glue mixture with white glue and water. Use 2 parts glue and 1 part water, this is messy, so be sure to cover your work surface.  Next, cut the thread and dip it in the glue and start wrapping it around the balloon.

stringeggs1

You can use a lot of string to wrap or use less, it is a personal choice as to which look you like. When you have have finished wrapping the entire balloon, you can hand them or prop them up to dry. When they are fully dry and stiff to the touch, hold the end of the balloon and pop it with a pin.

stringeggs2

stringeggs3

stringeggs4

Don’t be scared, I made a lot of these, and very few popped with a loud pop because of all the glue they are coated with. Instead, they release the air slowly making sounds similar to the snap, crackle and pop you hear when you add milk to Rice Krispies cereal. Once the balloon is completely deflated you can easily pull it out through an opening in the string.

stringeggs5

Place your string eggs in a bowl, put them on a ribbon to make a festive garland, use them to make a wreath, you can even add pretty little string lights, there are so many options, so have fun!

stringeggs6


stringeggs7


stringeggs8


stringeggs9


stringeggs10

stringeggs11


stringeggs12


stringeggs14


stringeggs15

Let me know if you tried this fun project. I would like to hear about your results and how you used them to decorate. Happy Easter!!!


1 Comment

Filed under Crafts, Easter, Home & Garden, kids

River Rock Painting – Fun Craft Project

In the fall, I stopped with my family on the banks of one of the many rivers that run through the beautiful mountains where I live.  I had an idea to paint some river rocks.  Collecting them was great fun for the whole family. Our little guys had fun throwing and skipping them into the river too! I have had such a good time giving these smooth rocks some personality.  I cannot wait for the weather to warm up so we can collect some more!

I collected a very large bucket full and when I got them home I washed them in a bucket of MelaMagic and Tough and Tender, then rinsed them and put them on brown craft paper to dry thoroughly.

riverrocks

riverrocks2

When they were fully dry, I painted  a base color on both sides and when dry I decided on what to transform them into. My first was my little yellow fish, followed by a couple of pink fish.  After painting a few more fish, I tried my hand at a butterfly, some ladybugs, a couple of frogs and owls.

riverrocks3

riverrocks4

riverrocks5

riverrocks6

riverrocks10

riverrocks9

riverrocks11

riverrocks8

riverrocks12

For painting the base painting and larger details I used an acrylic craft paint. I found that the Elmer’s Paint Markers are excellent for painting smaller details. When they are completely dry I sealed them with Mod Podge.

They are all so cute and look great on a desk as a paperweight, in flower pots, on windowsills, in decorative bowls or just about anywhere you want some color and character.  My little guys even started painting some of their own and it was so precious.  If you are looking for a great activity the whole family can get involved in, try painting river rocks.

Let me know if you try this.


6 Comments

Filed under Art, Crafts, Creative Activities, DIY, hobby

One of The Top Creative Toys For Kids of All Ages

Kaleidagraph


I recently had the opportunity to review the Kaleidograph Pattern Design Toy.  The  deceptively simple, die-cut cards of the Kaleidograph™ can be arranged in over 350 million designs. Based upon geometry in nature — the symmetries of crystals and flowers — the Kaleidograph upholds the tradition of the original, Froebel Kindergarten system that is known to have influenced Frank Lloyd WrightBuckminster FullerPiet Mondrian, and design education at the Bauhaus. Richly personal and environmentally friendly, the Kaleidograph is a toy for all ages. It fosters creativity, rewards with surprise, and brings out the designer in everyone. Made in the USA, the Kaleidograph carries on a tradition of fascinating geometric design toys dating back to the early 19th century.

This pattern set is so much fun.  It literally is great for all ages.  If I have it out, whoever walks in must play around with it and it is quite addicting.  It is so fun to see the different patterns everyone creates and how they get to that pattern.  Some are meticulous and calculating and other throw caution to the wind and just have fun.  It is simple yet expansive, ever-changing in its diversity, brilliant and beautiful, and mirrors nature’s own strategies of creation.

Explore symmetry and color combinations. See how small adjustments produce dramatic changes. The deceptively simple Kaleidograph can be arranged into millions of designs by combining and rotating the variety of die-cut cards. Each set also includes a full-color, two-sided insert with 68 example designs to challenge and inspire.

  •  Over 350 million combinations
  •  Full-color double-sided poster of designs included with both the Crystal and Flora sets
  •  Made in USA from sturdy, non-toxic paperboard
  •  About the size of a thick CD case — 4-3/4″ x 4-3/4″ x 3/8″
  •  Package serves as both sleeve for storage and frame for display
  •  For ages 3 to adult — a toy and a design tool

If you are looking for an original, fun and creative gift for the kids this holiday season, then take a look at   Kaleidograph Pattern Design Toy, it will really delight most anyone.  Mommy Ramblings is adding it to our Holiday Gift Guide.


Kaleidograph Pattern Design Toy Giveaway on Mommy Ramblings Rules:

Sorry this giveaway is over but check out our great giveaways going on right now HERE!

Continue reading


20 Comments

Filed under Crafts, Toys

Xyron Create-a-Sticker Max, 1.5″ Create-a-Sticker, and Mega Runner Review & Giveaway!!! {Giveaway Ended}

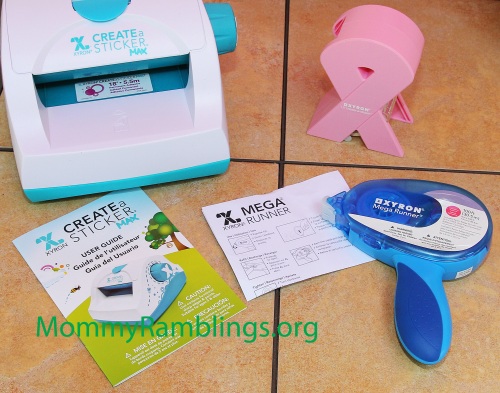
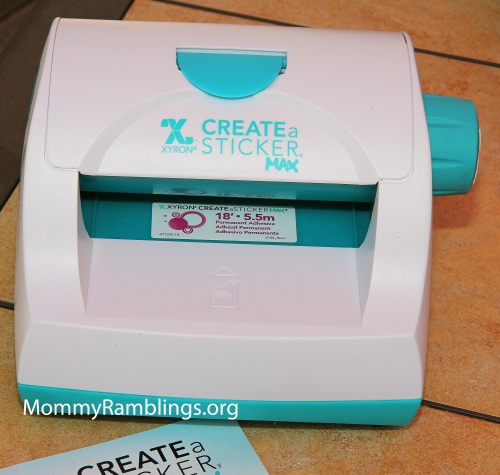
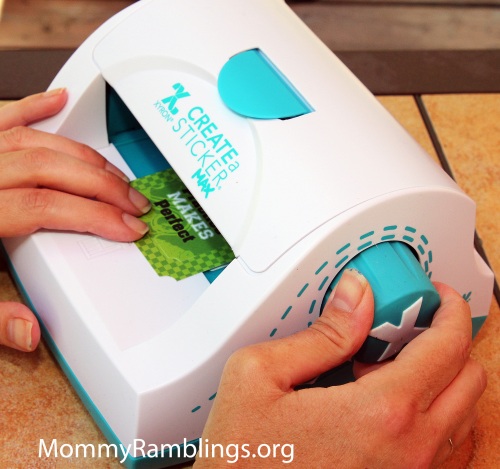
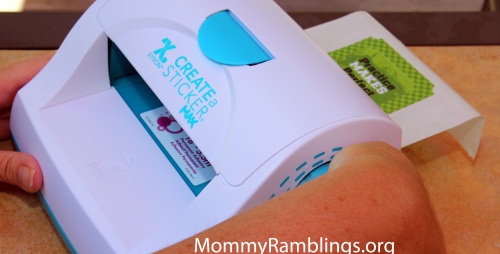
I was recently sent three great products from Xyron to review.  The first is the Xyron Create-a-Sticker Max.  This large sticker maker does not require electricity, batteries or heat.  Easily create stickers with the Xyron Create-a-Sticker Max.  Safe for kids to use since there is no heat involved and it is so easy and fun. You can make permanent and repositional stickers by using the correct cartridge.  Take a look at what I made:

Xyron Create a Sticker Max

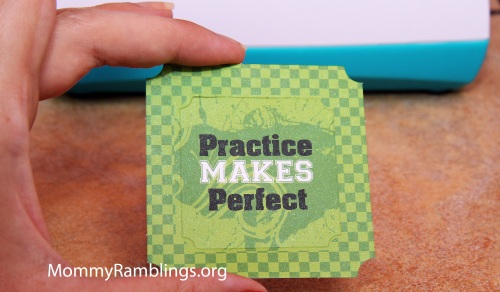
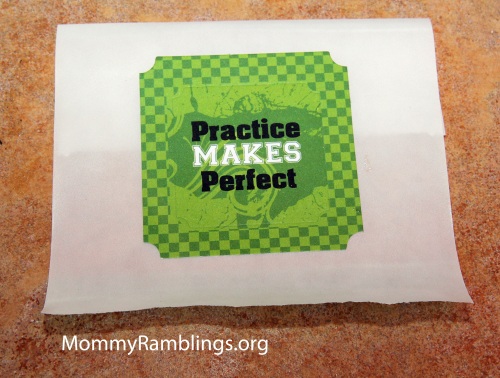
I chose this card stock cut out to make into a sticker.

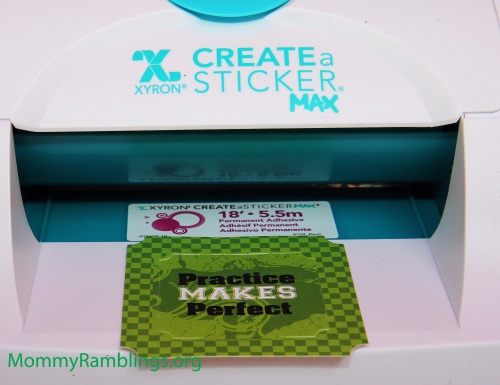
Place the item in the Xyron Create a Sticker Max.

Start feeding the item through while you turn the dial handle.

As you turn the dial your item will come out the back of the Create a Sticker Max as a sticker.

The trimmer in the back will trim the paper when you pull up and then you are all set.

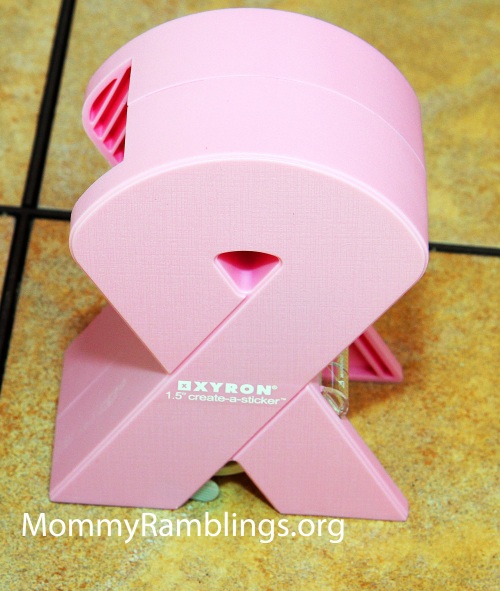
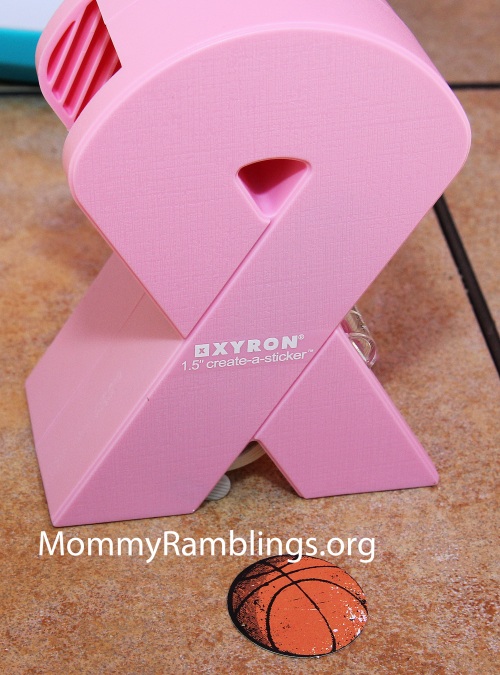
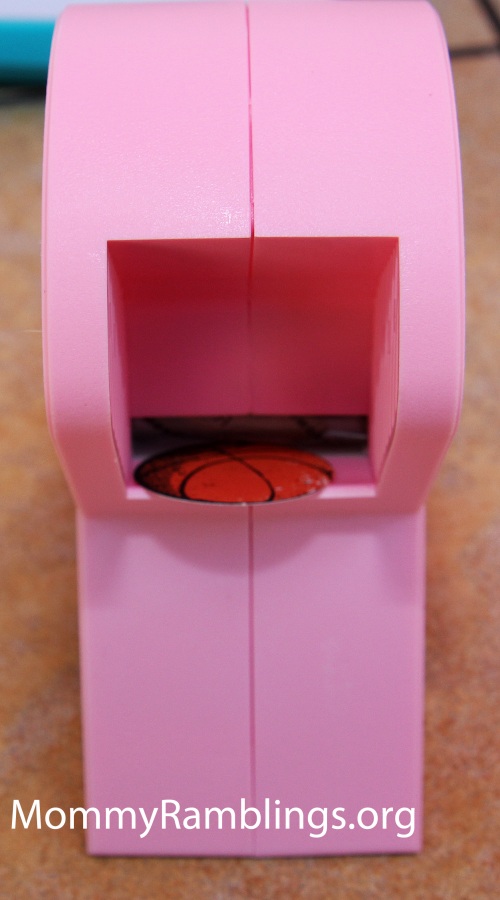
Now, if you want to make smaller stickers, the 1.5″ Xyron Create a Sticker is what you need.  I was sent this special edition Breast Cancer Research Foundation edition.  It is very easy to operate and also does not require batteries, heat or electricity.  Take a look at how it works:

1.5″ Special Edition Create a Sticker

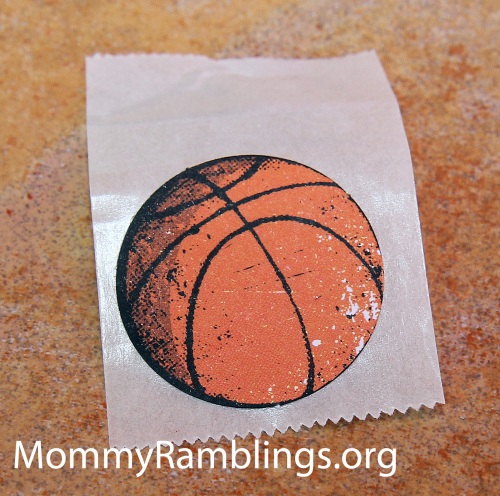
I chose this cardstock basketball to make into a sticker.

Place the object in the create-a-sticker unit.

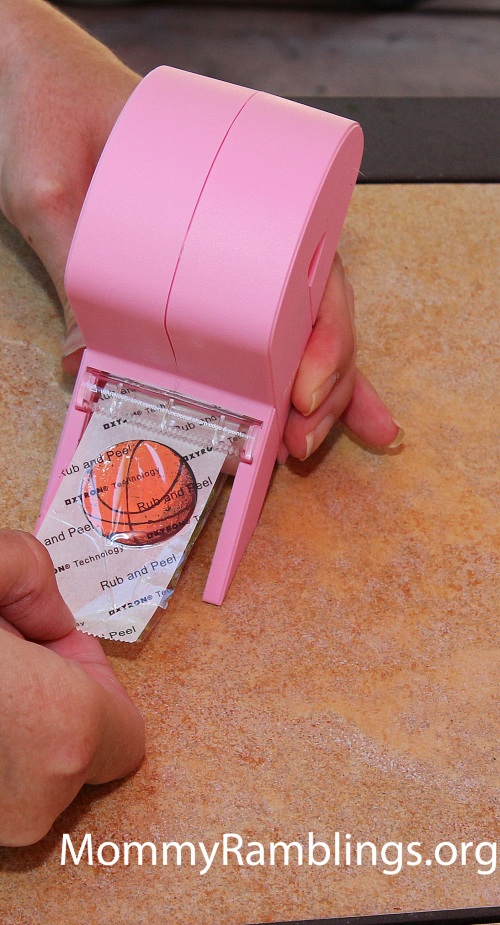
Pull and tear.

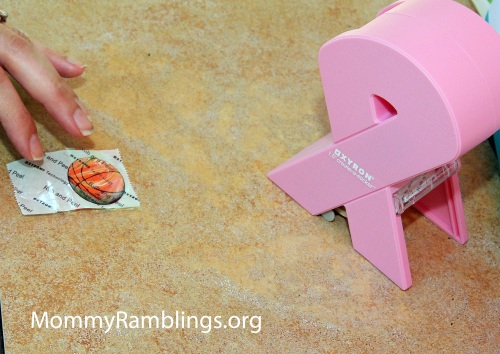
Rub and then peel the top layer off.

Your sticker is now ready!!!

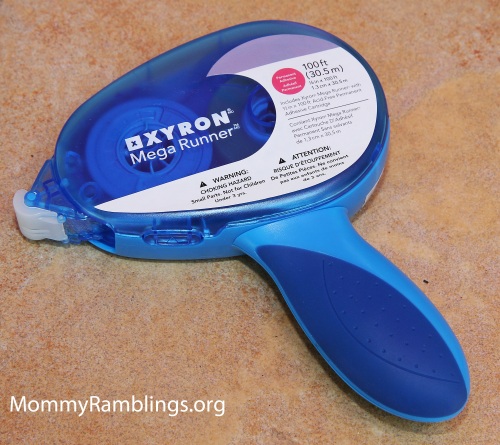
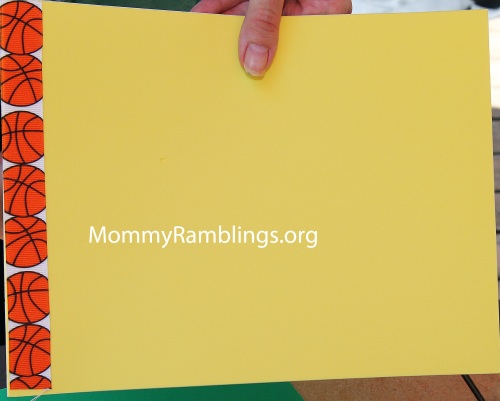
The third review item is the Xyron Mega Runner.  This nifty gadget will lay down an adhesive as you pull it back and is great for crafts, scrapbooking and many other projects.  It is super easy to use.  I used it to attach some ribbon to a foam sheet.  Take a look:

Xyron Mega Runner

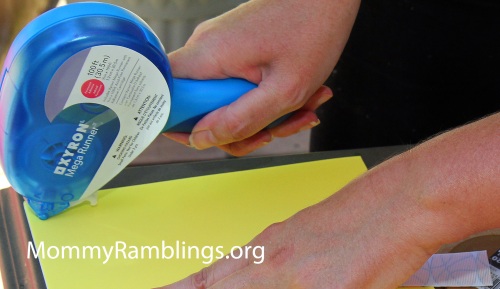
Touch the tip to the surface and pull.

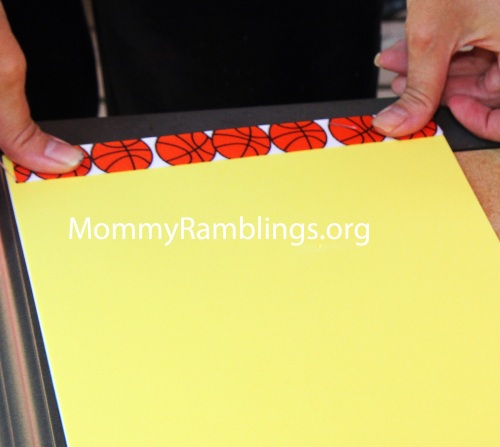
Then I applied the length of ribbon and pressed to secure.

Ribbon is strongly adhered to the foam.

 These three products are so easy to use and will make scrapbooking and crafting a breeze.

So do you like these products?  Then you will be thrilled to know that Xyron is sponsoring a give-away on Mommy Rambligns.  Three lucky blog readers will win their very own Xyron Create a Sticker Max.  Thank you Xyron for the review products and for sponsoring this awesome giveaway on Mommy Ramblings!!!

Xyron Create a Sticker Max Giveaway on Mommy Ramblings Rules:

Mandatory Entry-Visit the Xyron Website and let me know another great product you like.  Leave your answer in a comment on this post.  (If this entry is not done, all others will be deleted.)

Extra Entries: (make sure you leave a separate comment for each entry of they will not count)

1. Like Mommy Ramblings on Facebook and leave me a comment here that you did.

2. Follow Mommy Ramblings on Twitter, and leave me a comment here that you did with your Twitter name.

3. Subscribe to Mommy Ramblings by email and leave me a comment here that you did.

4. Vote for Mommy Ramblings on Picket Fence Blogs (Button is on the side of our blog, “We’re on the Fence) and leave me a comment here you did.  (You can do this every day for an extra entry, just make sure you leave a comment.)

5. Vote for Mommy Ramblings on Top Mommy Blogs (button is on the side of our blog) and leave me a comment here that you did.  (You can do this every day for an extra entry, just make sure you leave a comment.)

6. Post this give away on your Facebook status and leave me a comment here that you did.  (You can do this every day for an extra entry, just make sure you leave a comment.)

7. Tweet this give-away on Twitter and leave me a comment here that you did with your Twitter name.  (You can do this every day for an extra entry, just make sure you leave a comment.)

8. Like Blueberry Hill Photography on Facebook and leave me a comment here that you did.

Good Luck Everyone!!!  Giveaway Ends August 23rd  at 12am EST.  3 Winners will be selected by Random.org.


307 Comments

Filed under Crafts, Giveaway, Main Page Post, Mommy Ramblings