Tag Archives: cookies

Free Thanksgiving Printables, Activity Sheets, Crafts & Yummy Treats!!!

Thanksgiving Crafts Logo

Thanksgiving will be here next week!  I put together some crafts, cookies, treats and fun activities you can do with your family to celebrate!  Enjoy!!!

Thanksgiving Free Printables

Thanksgiving Place Cards will let you make your guests feel special and are cutomizable with names and photos!!!  Click on the picture below for the link. Click HERE to get started!!!

Thanksgiving Place Cards

Thanksgiving Paper Chain is a great activity for kids that can start a thankful tradition. Pick a color scheme and personalize the links, then print, cut, and assemble. Click HERE to get started with your chain.

Thanksgiving Paper Chain

Thanksgiving Fill Ins and More Thanksgiving Party Decor printables, customizable photo prop and more! Click HERE to start!

printable_decor_slot1

Timothy Turkey Activity Sheet Download HERE!

Make A Turkey Kid’s Activity Sheet (I love this one!) Download HERE!

First Thanksgiving Educational Crossword For Kids, Download HERE!

Thanksgiving Treats:

Thanksgiving-Food-Ideas


Turkey-Pops-500x268


Visit Living Locurto for more on these great treats!

More Yummy Ideas!!!

thanksgiving-treats-


Thanksgiving Cookies


thanksgiving-treats-corn

Visit Lucky Boy for these and more delectable Turkey Day Treats!!!


5 Comments

Filed under Uncategorized

Celebrate Halloween With Hershey’s Candy!!! #HersheysHalloween

Celebrate With Hershey's #HersheysHalloween

We’re a family of chocolate lovers and Hershey’s is the go-to candy choice in our home.  My little guys think there’s no better treat than a simple Hershey’s kiss.  They work so well for bribery, lol.  Who can resist , Kit Kat, Rolo, York Peppermint Patties, and of course the classic Hershey Bar, such an important component to the tasty S’mores we make at our fire pit.  I grew up with these candies and we are true Hershey fans. One of our favorite places is Hershey Park-The Sweetest Place on Earth.  It’s only a few hours from our home and many family vacations have been spent there.  Our Christmas tree is filled with treasured ornaments we brought home from our trips and include a replica of the Hershey kiss street lights adorned with their festive garland, the Hershey Park Carousel, a family of bears holding a huge Hershey’s Bar, a silver plated Hershey’s Kiss type of cage that can hold and trap delicious Hershey Kisses for holiday snacking and many more.

Hershey's Halloween Candy #HersheysHalloween

Halloween is a perfect time to have delectable Hershey’s chocolates on hand.  Have you see the new unwrapped Reese’s minis they are absolutely adorable and delicious.  Another of our favorites are  the pumpkin shaped York Peppermint Patties. The Kit Kat bar is sporting festive orange coating, Reese’s, Rolos and Kisses are wrapped in the colors of autumn and you need to check out the new Halloween Scream Eggs!

The Celebrate With Hershey’s website has great ideas for parties, crafts, recipes, costumes, videos and loads of other fun stuff to explore.  A great recipe we tried was the Hershey’s Kisses Peanut Butter Blossom Cookies (recipe below), they were a huge hit and my sweet four-year old came in and said, “Mommy what are you making for us?”  He was thrilled to see a cookie with his favorite candy all unwrapped and sitting with pride in the middle of a delectable peanut butter nest.  They are absolutely a family favorite we have made for years in our home.  There is a similar recipe for one using the Pumpkin Spice Kiss Here.

Hershey's Halloween Candy #HersheysHalloween

Cookies With Hershey's Kisses #HersheysHalloween


Celebrate With Hershey's #HersheysHalloween


Baking with Hershey's #HersheysHalloween


Hershey's Kiss Cookies #HersheysHalloween


Hershey's Candy Baking #HersheysHalloween


Ingredients

  • 48 HERSHEY’S KISSES Brand Milk Chocolates
  • 1/2 cup shortening
  • 3/4 cup REESE’S Creamy Peanut Butter
  • 1/3 cup granulated sugar
  • 1/3 cup packed light brown sugar
  • 1 egg
  • 2 tablespoons milk
  • 1 teaspoon vanilla extract
  • 1-1/2 cups all-purpose flour
  • 1 teaspoon baking soda
  • 1/2 teaspoon salt
  • Additional granulated sugar

Directions

  1. Heat oven to 375°F. Remove wrappers from chocolates.
  2. Beat shortening and peanut butter in large bowl until well blended. Add 1/3 cup granulated sugar and brown sugar; beat until fluffy. Add egg, milk and vanilla; beat well. Stir together flour, baking soda and salt; gradually beat into peanut butter mixture.
  3. Shape dough into 1-inch balls. Roll in granulated sugar; place on ungreased cookie sheet.
  4. Bake 8 to 10 minutes or until lightly browned. Immediately press a chocolate into center of each
    cookie; cookie will crack around edges. Remove from cookie sheet to wire rack. Cool completely.
    Makes about 48 cookies.


Earlier this year I made the ultimate in decadent desserts with a  brownie bottom, peanut butter, chocolate,Reese’s  peanut butter cup cheesecake.  It was a birthday cake for my son and is filled with cut up Reese’s Peanut Butter Cups as well.

Reece's Cheesecake #HersheysHalloween

So get ready for all the little and big ghosts, goblins, princesses and superheroes who will be stopping by for a treat on Halloween with a variety of Hershey’s candy.  If you do you are certain not going to be the brunt of any tricks.

This post is SPONSORED by Global Influence with PRODUCT provided by Hershey’s but the opinions expressed are my own.

5 Comments

Filed under Uncategorized

Musselman’s Applesauce Review & Giveaway!!!

If you find yourself running around a lot more these days, you can tell, we are full swing into spring.  It seems like every day we are running somewhere, and usually a few minutes behind when I realize my little guy is going to need a snack at brother’s t-ball game or something similar.  This is the time I want to be able to reach for something healthy that he can munch on the go.  If you find yourself in similar situations, then you will be happy to hear what I am going to share.  I was recently picked to take part in a Musselman’s Applesauce Review and Giveaway.  I was sent an assortment of Musselman’s delicious applesauce products.  Musselman’s is also on Pinterest with great recipes that you can use their applesauce in to whip up healthy treats for when you are on the go during the busy spring and summer months.  Recipes like Applesauce Oatmeal Cookies, Chewy Fruit Bars, Fruit & Nut Trail Cookies and so many more.  You can search through all of the recipes HERE.  Or follow Musselman’s on Pinterest HERE.

We chose to make the Applesauce Oatmeal Cookies first.  They were super easy to make and they taste very cake like more than cookie, kind of like a muffin top.  Super delicious, sweet and soft.  I can’t wait to try the Chewy Fruit Bars and Fruit & Nut Trail Cookies.

Apple Sauce Oatmeal Cookies

Ingredients

  • ½ cup shortening
  • 1 cup sugar
  • 1 egg
  • 1¾ cups flour
  • ½ teaspoon baking powder
  • 1 teaspoon baking soda
  • ½ teaspoon salt
  • 1 teaspoon cinnamon
  • ½ teaspoon cloves
  • ½ teaspoon nutmeg
  • 1 cup raisins
  • 1 cup rolled oats
  • 1 cup MUSSELMAN’S ® APPLE SAUCE
Directions

Preheat oven to 375 degrees F. Cream shortening and sugar. Add egg and mix well. Stir together flour, baking powder, soda, salt and spices. Stir in raisins and rolled oats. Add dry ingredients alternately with Musselman’s Apple Sauce to creamed mixture. Chill in refrigerator at least one hour before baking. Drop by teaspoonfuls onto greased baking sheet. Bake at 375 degrees for 12-15 minutes. Makes 8-10 dozen two-inch cookies.

Servings: 96

Cooking Time: x15

Musselman’s is sponsoring a giveaway on Mommy Ramblings.  One lucky blog reader will win an assortment of Musselman’s applesauce products like I received.  Than you Musselman’s for the review products and for sponsoring this saucy giveaway on Mommy Ramblings!!!  Open to US residents.

Musselman’s Applesauce Giveaway on Mommy Ramblings Rules:

Please enter the giveaway using Rafflecopter below.  Good Luck!!!

Continue reading


17 Comments

Filed under Uncategorized

The Protein Bakery Review & Give-Away!!! {Give-Away Ended}

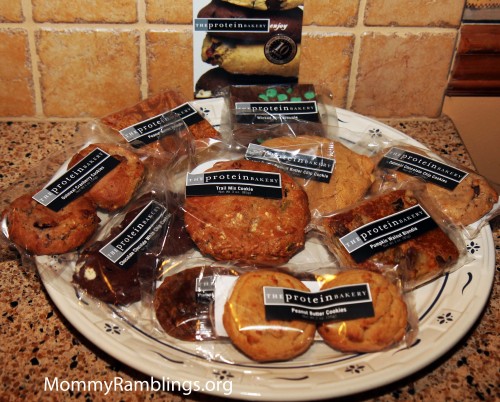
I was recently sent an assortment of goodies to taste and review from The Protein Bakery.  Even in the wrappers they looked delicious. For 10 years the Protein Bakery has  expertly been creating delicious and healthy snacks that make your body’s engine work better. Their idea is simple: use the highest quality, natural ingredients, baked to perfection. Don’t add any preservatives or flavors. And as their name suggests– they use the purest whey protein isolate available. Each cookie, brownie, blondie has more protein and a few less carbohydrates than most snacks available. This nutritional balance prevents a heart rate change and won’t spike your blood sugar. Also of note: for people with wheat allergies, their products are wheat free. They do this by using rolled oats, which in turn adds dietary fiber. (Which is good for every body.)

Okay so all that sounds great right?  However, does it taste like a bird seed cake or does it taste decadent.  I can tell you their goodies were delicious, the blondies, the cookies were just so moist and rich, the kind of dessert you would eat at a party and beg the host for the recipe.  Definitely not something you would think was enhanced with whey protein.  Oh my gosh, as I am writing this I am fighting the urge to go into the kitchen for another snack form The Protein Bakery.  They definitely have a new customer.

The Protein Bakery does not believe in mass production.  They  produce all their baked goods in small batches. Which ensures they’re always sent to you fresh.  They have lots of great assortments that are perfect for gift giving and don’t forget to get some for yourself.  Once you have tasted their blondies, brownies and cookies, you will not forget to get some for yourself.

I have some great news to share.  The Protein Bakery is sponsoring a give-away on Mommy Ramblings.  One lucky blog reader will win a sample pack from The Protein Bakery.  The sample pack will include an assortment of 2 brownies/blondies, 2 colossal cookies and 4 cookie 2-packs, a $45 value.  Thank you to The Protein Bakery for the review assortment and for sponsoring this delicious give-away on Mommy Ramblings.  Open to US residents.

The Protein Bakery Assortment Pack Give-Away on Mommy Ramblings Rules:

Mandatory Entry– Visit The Protein Bakery, and let me know something you would like to try.  Leave your answer in a comment on this post. (If this entry is not done, all others will be deleted)

Extra Entries: (make sure you leave a separate comment for each entry or they will not count)

1. Like Mommy Ramblings on Facebook and leave me a comment here that you did.

2. Follow Mommy Ramblings on Twitter, and leave me a comment here that you did with your Twitter name.

3. Follow Mommy Ramblings by email, and leave me a comment here that you did.

4. Vote for Mommy Ramblings on Picket Fence Blogs (Button is on the side of our blog, “We’re on the Fence) and leave me a comment here you did.  You can do this once a day, just make sure and leave a comment each time you do.

5. Rate Mommy Ramblings on Top Mommy Blogs (button is on the side of our blog) and leave me a comment here that you did. (Can only be used as one entry per give-away.)

6. Tweet this give-away on Twitter and leave me a comment here that you did with your Twitter name. You can do this once a day, just make sure and leave a comment each time you do.

7. Like Blueberry Hill Photography on Facebook and leave me a comment here that you did.

8. Write a review for Mommy Ramblings on Alexa.com (button is on our blog right under the We’re on the Fence button) and leave me a comment here that you did.  Can only be done once per give-away.

Good Luck Everyone!!!  Give Away Ends November 8th at 12am EST.   Winner will be selected by Random.org.


250 Comments

Filed under Uncategorized

Rycraft Heirloom Cookie Stamp Review!!!

3 cookie stamps and cookies

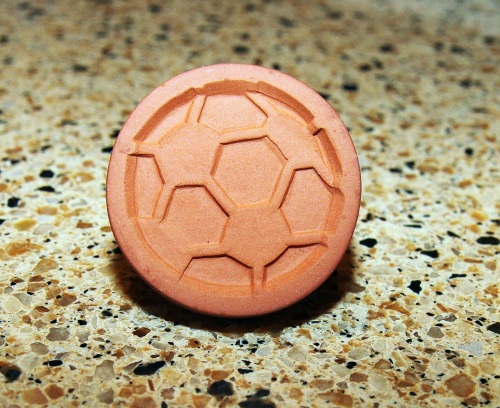
I was asked to choose a couple of Rycraft Heirloom Cookie Stamps to review.  It was hard to choose from the vast selection of designs, but I finally chose the Scottie dog and the soccer ball.  I chose the Scottie dog because it is so cute and looks like my Westie.  It was also my mother’s favorite dog, so I knew that had to be one that I would try.  I chose a soccer ball for my sports crazy kids.  The stamps are so well made and beautiful.  The Scottie dog stamp had a beautiful blue glaze and the soccer ball a stunning white glaze.  The first thing I did was season the stamps with a bit of oil.  Then I chose a recipe out of the booklet that included recipes for Almond Butter Cookies, Brown Sugar Shortbread, Melting Moments, Fruit Jell-O Cookies, Unbelievable Peanut Butter Cookies, Peanut Butter Crunchies, Cookie Stamp Shortbread and Cream Cheese Candy.  These stamps are also great for crafting and you can go to their site at www.cookiestamp.com to see the online catalog and order kits and books on paper and clay casting along with dozens of inspiring project ides.  The booklet that came with the stamps also included basic clay casting and basic paper casting instructions.

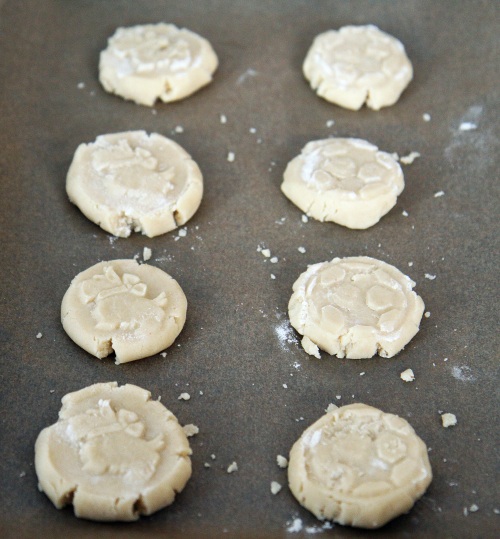
I chose to just whip up some Almond Butter Cookies.  The recipe is very simple and is 1 cup of butter, 1/2 cup of sugar, 1tsp of almond extract 1/4 tsp of salt, and 2 cups of flour.  The only change I made is that I added some vanilla extract as well.  I had planned on just chilling the dough a few hours but it chilled for about 24 hours or a bit over.  It was hard as a rock when I took it out.  I put it on the counter to soften up but I had to work fast since I was taking Ethan out for sneakers.  I started to knead it and it softened fairly quickly.  The stamps were very easy to use and I put flour on them before each stamping.  I love the detail of these stamps and how well they worked.  The eye of the Scottie dog and all the detail was so visable.
This is before baking:

After Baking:

The cookie was buttery and rich and perfect with a cup of coffee.  I am looking forward to trying the other recipes as well as the craft projects.  I hope you will take a look at their website and be inspired.

Shortbread chocolate painted cookies


1 Comment

Filed under Uncategorized

Paula Deen’s Monster Cookie, Review!!!

I decided to try a recipe I found on the Food Network site.  It is a recipe for Monster Cookies which is courtesy of Donna Haney and adapted by Paula Deen.  The recipe is as follows:

Ingredients

  • 3 eggs
  • 1 1/4 cups packed light brown sugar
  • 1 cup granulated sugar
  • 1/2 teaspoon salt
  • 1/2 teaspoon vanilla extract
  • 1 12-ounce jar creamy peanut butter
  • 1 stick butter, softened
  • 1/2 cup multi-colored chocolate candies
  • 1/2 cup chocolate chips
  • 1/4 cup raisins, optional
  • 2 teaspoons baking soda
  • 4 1/2 cups quick-cooking oatmeal (not instant)

Directions

Preheat the oven to 350 degrees F. Line cookie sheets with parchment paper or nonstick baking mats.

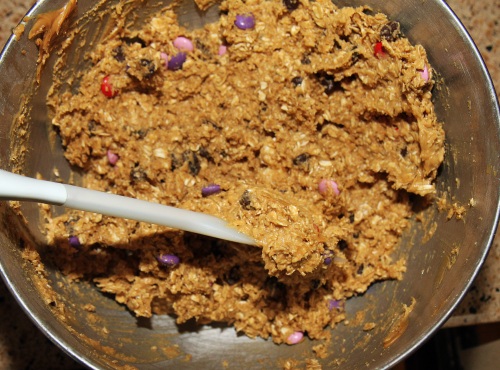
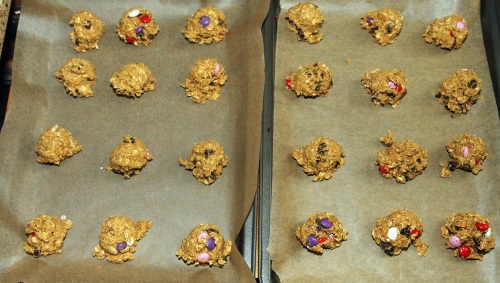
In a very large mixing bowl, combine the eggs and sugars. Mix well. Add the salt, vanilla, peanut butter, and butter. Mix well. Stir in the chocolate candies, chocolate chips, raisins, if using, baking soda, and oatmeal. Drop by tablespoons 2 inches apart onto the prepared cookie sheets.

Bake for 8 to 10 minutes. Do not overbake. Let stand for about 3 minutes before transferring to wire racks to cool. When cool, store in large resealable plastic bags.

I made some changes.  First I do not cook or bake with salt for the most part so I omitted that.  Second I chose to cream the butter and sugars the old school way and then add the egg.  I had read some reviews that said these cookies spread too much when baked so be sure to use fresh baking soda.  I also use more vanilla because I always use more vanilla.  : )  Oh and I might have just added a few more of the chocolate candies and I used dark chocolate m&ms.  I used Skippy natural smooth peanut butter (the one you do not have to stir).

It is important not to overbake these cookies and let them cool on the cookie sheet for at least 3 minutes before transferring them to the cooling rack.

I guess my baking soda was super duper fresh because my cookies did not spread at all.  I actually mashed the tops down a little when I removed them from the oven.

So, my overall impressions of this cookie is that I like that it uses oats instead of white flour.  Seems like a healthier option for a cookie, and the dark chocolate and semi-sweet chips have anti-oxidants, and raisins are a fruit.  : )    They are nice and soft and chewy and taste good.  Even my son who does not like raisins, liked them.  I don’t know that I am head over heels, gotta make these again, but I am a little hard to win over cookie wise.   They are a good cookie and seemed to be a hit in this house, so at the end of the day, gotta give them the thumbs up!!!  Try the recipe and tell me what you think.


Leave a Comment

Filed under Uncategorized

Valentine’s Day Treats!!!

Besides baking Michael’s birthday cake for tomorrow, I decided to bake some sugar cookies for  Valentine’s Day.  I use the following sugar cookie recipe and I just love it.

Ingredients

  • 1 1/2 cups butter, softened
  • 2 cups white sugar
  • 4 eggs
  • 1 teaspoon vanilla extract
  • 5 cups all-purpose flour
  • 2 teaspoons baking powder
  • 1 teaspoon salt (I do not use the salt myself)

Directions

  1. In a large bowl, cream together butter and sugar until smooth. Beat in eggs and vanilla. Stir in the flour, baking powder, and salt. Cover, and chill dough for at least one hour (or overnight).
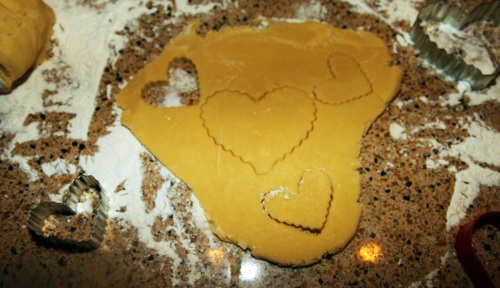
  2. Preheat oven to 400 degrees F (200 degrees C). Roll out dough on floured surface 1/4 to 1/2 inch thick. Cut into shapes with any cookie cutter. Place cookies 1 inch apart on ungreased cookie sheets.
  3. Bake 6 to 8 minutes in preheated oven. Cool completely.

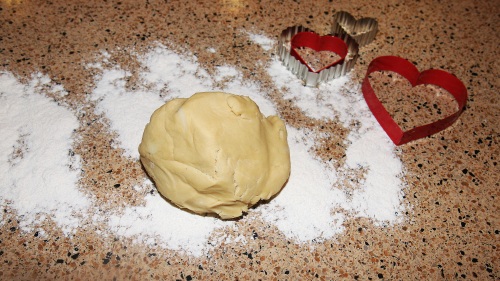
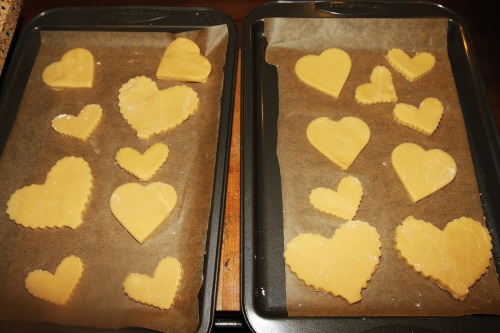
Use Valentine’s Day theme cookie cutters. I chose to use hearts of different sizes and edges.

The dough is so easy to work with.

Prior to baking you can decorate or leave plain to dip in chocolate after baked.

I do not let them over bake and I love that they are soft and not crunchy.

The recipe makes a good amount of cookies.  Amount will depend on the size of cookie cutters you use but I have three platters full.

These cookies were calling to Ethan who we told had to wait until after dinner.  As you can see from his face and hands, he did not waste any time.


Leave a Comment

Filed under Uncategorized

Baking Flowers!!! My Review of the John Wright Flower Cast Iron Muffin Pan!

The UPS driver had a treat for me today.  The John Wright Company sent me one of their cast iron flower muffin pans.  The original Wrightsville Hardware Company was founded in 1880 near their  present location in Wrightsville, Pennsylvania. Along with their foundries, they have a retail store and outlet in a converted turn-of-the-century warehouse on the bank of the lovely Susquehanna River.  John Wright remains America’s oldest continuously operating manufacturer of cast iron products!!  Their products are proudly made in the USA.

The first thing to note about this pan is its weight.  One could easily get a great bicep workout just by lifting the pan a few times.  The detail is also amazing.  There are 7 different flowers and the name of each flower is written into each cast iron mold.

A nice assortment of recipes accompanied the pan.  I chose to make the corn bread muffins.  The recipe is as follows:

Corn Bread Muffins

1 Cup All-Purpose Flour

1/4 Cup Sugar

3 Teaspoons Baking Powder

1/2 Teaspoon Salt

1 Cup Yellow Corn Meal

1 Egg Well-Beaten

1 Cup Milk

5 Teaspoons Butter, Melted

Preheat oven to 375 degrees.  Mix together flour, sugar, baking powder, and salt.  Add corn meal.  Add to mixture: egg, milk, and melted butter.  Beat until smooth, but don’t overmix.  Bake in the greased muffin pan at 375 degrees for 12-15 minutes or until lightly browned.

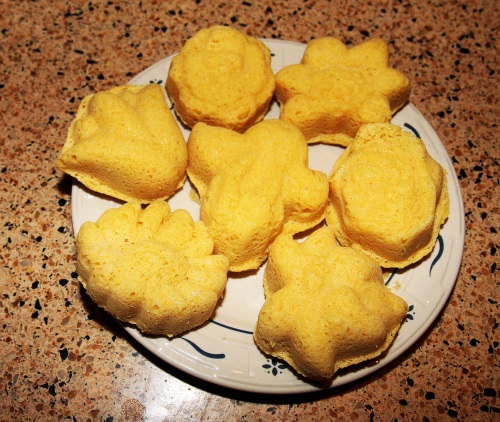
I made the above mixture and it filled the muffin pan exactly.


The muffins are a very generous size.  As soon as they achieved the desired golden brown color, they were removed from the oven.


The muffins just lifted right out of the pan without any problem or sticking.  The muffins were beautiful, big, and airy.

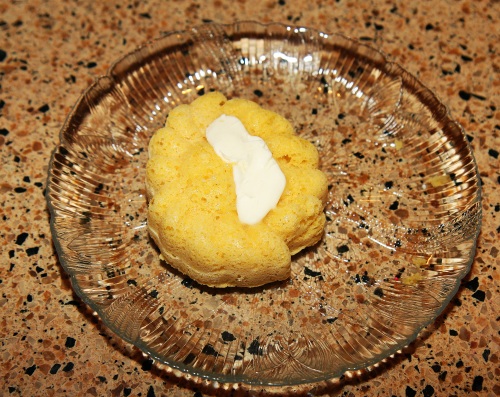
Add some butter and enjoy!

Don’t they look delicious?


I give this pan and the John Wright Company 2 thumbs up!  I think I am going to have to try their cookie pans next.  They have great cookie pans that have lots of neat designs like: Alphabet Cookie, Sweetheart Cookie, Sleigh Full O’Toys Cookie and many more.  Their molded cookie recipes with these pans, I just have to try.  All of the John Wright molds are coated with their exclusive non-stick coating, “Ironclad Non-Stick Coating”  If you would like to purchase one of their pans you can call their toll free number for the nearest store, 1-800-444-9364.  You can also order from their website at http://www.jwright.com

I hope you give their pans and recipes a try.  I am telling you these are the most delicious corn muffins I have ever had.  Try it, and see if you do not agree.


1 Comment

Filed under Uncategorized

Paula Deen’s, Chocolate Gooey Butter Cookies

I am really not sure if these are a true Paula Deen creation because I see the recipe with a different kind of cake mix without the Paula Deen name.  Anyhow, I made these Chocolate Gooeey Butter Cookies a few weeks ago and my husband loved them and has been begging me to make them again so I did.  They are super easy and from what I have been reading you can use any flavor cake mix.  So far I have only chocolate varieties.  Next time I may try a  golden or butter cake mix and see how they taste.   Anyway here is the super-duper easy recipe.  Feel free to comment with your individual results and if you tried different cake mixes.  Would love to hear your opinions.

Ingredients

  • 1 (8-ounce) brick cream cheese, room temperature
  • 1 stick butter, at room temperature
  • 1 egg
  • 1 teaspoon vanilla extract
  • 1 (18-ounce) box moist chocolate cake mix
  • Confectioners’ sugar, for dusting

Directions

Preheat oven to 350 degrees F.

In a large bowl with an electric mixer, cream the cream cheese and butter until smooth. Beat in the egg. Then beat in the vanilla extract. Beat in the cake mix. Cover and refrigerate for 2 hours to firm up so that you can roll the batter into balls. Roll the chilled batter into tablespoon sized balls and then roll them in confectioner’s sugar. Place on an ungreased cookie sheet, 2 inches apart. Bake 12 minutes. The cookies will remain soft and “gooey.” Cool completely and sprinkle with more confectioners’ sugar, if desired.


Leave a Comment

Filed under Uncategorized

Epic Fail Or So I Thought!!!

I like to eat and cook healthy things for my family.  Most of the time we have good results but most times I use whole wheat flour in cookies it is sandy or gritty and just tastes off.  I scoured the internet food sites and found a recipe for chewy ginger snaps that used whole wheat flour.  It had nearly 200 rave five-star reviews.   What could be bad?  Well, I put the ingredients in my mixer, formed the dough into balls, dipped the tops turbinado sugar and baked.  The  first batch spread all over the cookie sheet to form a rectangular sheet of ginger cookie that was soft but had a very sandy gritty texture and just lacked the deliciousness.  Second batch I made smaller balls and did not butter the sheet in hope that they would not spread as much.   They did not spread as much but they still spread and ended up almost like a taffy like candy than a cookie.  I do not know what I did wrong and I really do not know how they got the rave reviews they did.  After the second batch, the rest of the dough went in the sink.  Live and learn.  I have to update, as I posted this my dear husband came in and told me these were the best cookies to which my daughter agreed.  He said even though they were mishapped they were delicious and was so sad that I did not bake the whole batch and told me he loves them.  My daughter agreed.  Maybe I am too hard on myself.  Oh well!

I had high hopes!

They did not pan out!


Leave a Comment

Filed under Uncategorized